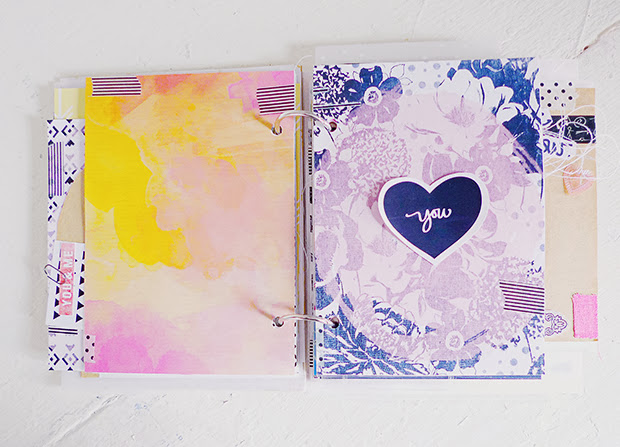
Valentine Mini Album // Part Two // Pages 12-13
Today I'll be sharing more of my Valentine Mini Album. Check out Part One here and for an overview of the entire 37 page album, you can visit my post over on the Glitz Design blog. In this three part series, I go into more depth and you'll find additional images and details on my album construction below.

Valentine Mini Album // Part Two // Pages 14-15


Valentine Mini Album // Part Two // Pages 16-17
I use a lot of white thread and wood veneer throughout my entire album because I love the added texture and their neutral base keep them from becoming a distraction. This cute little typewriter is from the Heyday Collection by Studio Calico.

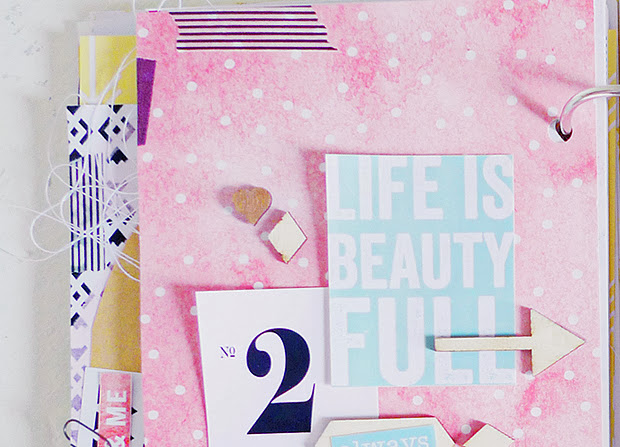
Valentine Mini Album // Part Two // Pages 18-19
On these pages, I threw in some Arrow and Elongated Hexagon Wood Veneers by Studio Calico into the mix. The hexagons make a great base for work strips or other types of captions.
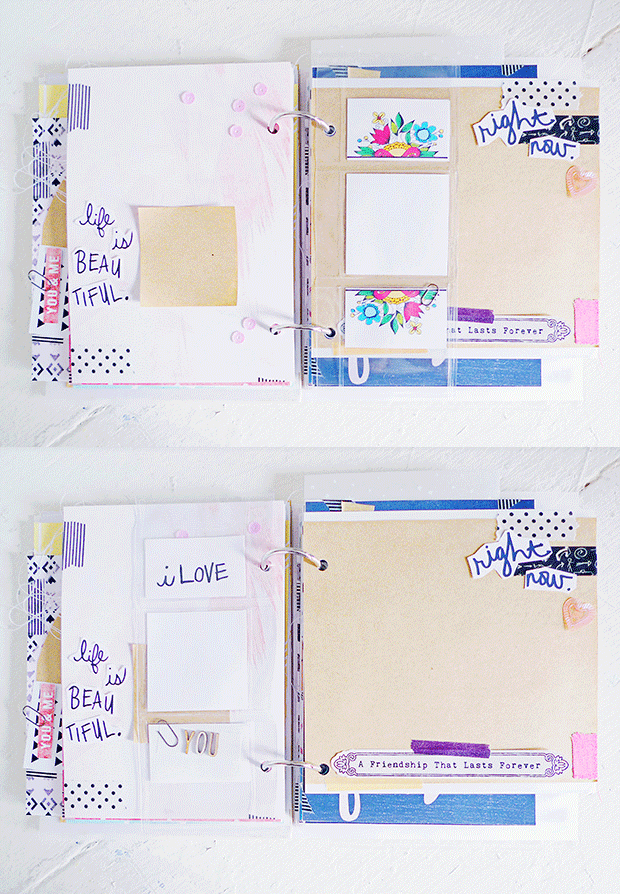
Valentine Mini Album // Part Two // Pages 20-21
I added another plastic pocket insert in between these two pages and left a blank photo mat in the middle to add a photo.

Valentine Mini Album // Part Two // Pages 20-21 Closeup
On the flip side of the insert, I added some embellishments, including word art using Studio Calico's Darling Dear Alphabet Wood Veneers. These might be the cutest wood veneers I've ever seen and they came with the Copper Mountain Studio Calico Project Life Kit (which was also the cutest ever btw).

Valentine Mini Album // Part Two // Page 20 Closeup
These are "cotton candy" colored sequins I found at the Studio Calico shop. I love the color and they seem to always pretty selection of hues in stock there.

Valentine Mini Album // Part Two // Pages 22-23

Valentine Mini Album // Part Two // Pages 24-25
Here, I've added more of my own typography using Photoshop. I also used Tim Holtz Label Letters to spell out "I love you more than all the stars in the sky" and this pretty constellation patterned vellum to layer in between.


Valentine Mini Album // Part Two // Pages 26-27

Valentine Mini Album // Part Two // Pages 28-29
In between these two pages, I've sandwiched a plain velum insert, creating white space in an otherwise crowded spread.

Valentine Mini Album // Part Two // Pages 28-29 Closeup
I also added a plastic insert with lots of options for photos. In the corner, I slipped in "M" and "R" typewriter keys by Tim Holtz and embellished them with a bit of bakers twine.

Valentine Mini Album // Part Two // Pages 30-31
This is the last set of plastic pockets. It's filled with journal cards by Glitz Design still has room for a few photos.
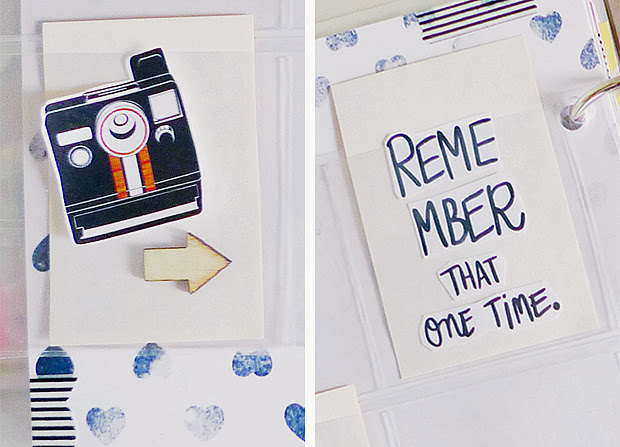
Valentine Mini Album // Part Two // Pages 30-31 Closeup
Again, I've added interest to the flip side of the insert by adding word art and a couple embellishments.


Valentine Mini Album // Part Two // Pages 32-33 Closeup
This is the last set of pages I'll be sharing today. The little star accent is from confetti included in my Studio Calico Valley High Project Life Kit--definitely easy enough to make, but nice to have on hand. I've shared a link below along with all the other supplies from Part One of this series as well. Tune back in for Part Three at the end of the week!
SUPPLIES
Digital:
Project Life Midnight Edition
Project Life Sunshine Edition
Glitz Design "Color Me Happy" full kit
Glitz Design "Dapper Dan" full kit
Glitz Design "Finnley" full kit
Glitz Design "Hello Friend" full kit
Glitz Design "Love You Madly" full kit
Glitz Design "Raven" full kit
Glitz Design "Sunshine in My Soul" element pack
Glitz Design "Uncharted Waters" full kit
Glitz Design "Vintage Blue" elements
Glitz Design "Vintage Blue" paper
Glitz Design "Wild & Free" full kit
Glitz Design "Yours Truly" full kit
Other:
Martha Stewart Crafts Metallic Acrylic Paint
American Crafts Thickers - Fabric Doll
Epson Matte Presentation Paper
MT Washi Tapes - Black & White Stripe & Dots
Studio Calico Sundrifter Shapes
The Pier Plastic Alphas and Numbers
20 Pocket Coin Storage Sheets
Carte Postale Acetate Alphas
Tim Holtz Mini Paper Clips
Studio Calico Elongated Hexagons Wood Veneer
Studio Calico Atlantic Tiny Hearts Wood Veneers
Studio Calico Heyday Wood Veneer
Studio Calico Hearts & Arrows Wood Veneer
Studio Calico Darling Dear Alphabet Wood Veneers
Studio Calico Sequins
Tim Holtz Label Letters
Studio Calico Jamestown Patterned Vellum Paper
Frecked Fawn Wood Chips: Hearts
Tim Holtz Typewriter Keys
Studio Calico Project High Project Life Kit
Studio Calico Copper Mountain Project Life Kit
Digital:
Project Life Midnight Edition
Project Life Sunshine Edition
Glitz Design "Color Me Happy" full kit
Glitz Design "Dapper Dan" full kit
Glitz Design "Finnley" full kit
Glitz Design "Hello Friend" full kit
Glitz Design "Love You Madly" full kit
Glitz Design "Raven" full kit
Glitz Design "Sunshine in My Soul" element pack
Glitz Design "Uncharted Waters" full kit
Glitz Design "Vintage Blue" elements
Glitz Design "Vintage Blue" paper
Glitz Design "Wild & Free" full kit
Glitz Design "Yours Truly" full kit
Other:
Martha Stewart Crafts Metallic Acrylic Paint
American Crafts Thickers - Fabric Doll
Epson Matte Presentation Paper
MT Washi Tapes - Black & White Stripe & Dots
Studio Calico Sundrifter Shapes
The Pier Plastic Alphas and Numbers
20 Pocket Coin Storage Sheets
Carte Postale Acetate Alphas
Tim Holtz Mini Paper Clips
Studio Calico Elongated Hexagons Wood Veneer
Studio Calico Atlantic Tiny Hearts Wood Veneers
Studio Calico Heyday Wood Veneer
Studio Calico Hearts & Arrows Wood Veneer
Studio Calico Darling Dear Alphabet Wood Veneers
Studio Calico Sequins
Tim Holtz Label Letters
Studio Calico Jamestown Patterned Vellum Paper
Frecked Fawn Wood Chips: Hearts
Tim Holtz Typewriter Keys
Studio Calico Project High Project Life Kit
Studio Calico Copper Mountain Project Life Kit

 This is snail mail I created last month for the